This article will walk through the process of creating a list in Autoreach through a .CSV file upload. A list allows you to create a series of contacts to be called.
Key Concept
There are two options when it comes to list creation and you can only use one of the below methods:
Option 1: Assignment Mode:
Admins and supervisors will build lists and then assign them to agents
OR
Option 2: All Role Creation Mode:
All roles have the ability to create lists with the following parameters:
- Agents can create lists only for themselves to dial
- Supervisors and admins can create:
- Single-rep lists for one agent
- Multiple-rep lists for ALL agents meaning this list will be exposed and dialabled by all agents
Note: You can define which mode you'd like to select under Account Settings:
- For Assignment Mode, Allow Reps to Create Lists = False (unchecked)
- For All Role Creation Mode, Allow Reps to Create Lists = True (checked)


There are 3 primary steps in list creation:
- Preparing a List
- Uploading a List
- Assigning a List
Preparing a List
A sample template can be downloaded here for reference.
By default, AutoReach automatically recognizes 3 configurable column headers: name, company, and title. Additionally, we recognize email and external URL but these two are not configurable.
External URL is used for the sole purpose of a screen pop meaning AutoReach can automatically pop a URL destination of your choice while making an outbound call simultaneously. Many of our customers like to screen pop into a contact record inside of their CRM (ex Salesforce, Hubspot, etc). You can perform this functionality as long as you have an external URL value associated with the record.
Note: The URL must begin with a "https://"
AutoReach will perform a CONTAINS function against the column headers in your CSV to identify which columns of data that you want to bring into AutoReach. Under Account Settings, you’ll need to enter in values that match the column headers from your CSV in order to pull in those columns. Please also be sure that there are no duplicates across your column headers inside of your CSV. For example, your CSV might have the word "company" in two fields (example Company Address, Company Revenue, etc). Otherwise AutoReach will just pull from the first field that contains "company."
FAQ: How do I add more custom columns?
If you're looking to add more fields (no more than 2-3), you can leverage Excel’s CONCATENATE function to combine multiple columns together
Example: if you want to merge Column A and column B together in a CSV, you can input this into a cell:
-
- =CONCAT([Cell of Column A Header]>, “-“ , [Cell of Column B Header])
- The “-” puts a - to separate the two values
If you require more fields 4+ additional fields, consider upgrading to Campaign Management (Standard or Enterprise) as both licenses can store an unlimited number of custom fields.
Note: The order of the list (sorted by last name alphabetically, sorted by location, etc.) is dependent on the sorting order of the CSV uploaded into AutoReach. Be sure to sort the data in your preferred manner before uploading.
Uploading a List
Once the .CSV file has been prepared correctly, it is time to upload it into AutoReach. Lists can either be:
- Single-rep meaning that only one agent can call down this list
- Multiple-rep meaning that more than one agent can call down this list
- Exception: if you want a single agent to call a list that contains more than 200+ records, you will need to create a multiple-rep list but only assign that one agent. AutoReach will also also prompt you if you exceed that number inside of the dialing session
- From the AutoReach My Lists homepage, select Add under Add New List
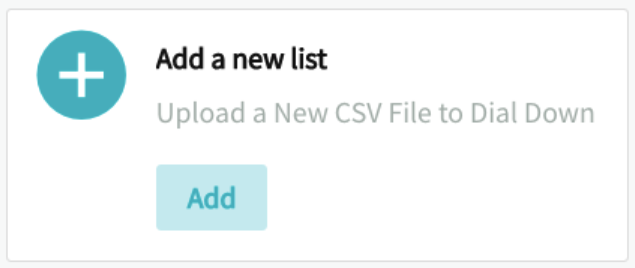
-
- This will bring you to the following window:
- This will bring you to the following window:
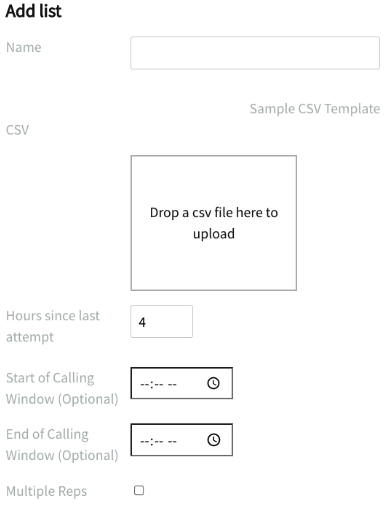
- Insert a list name
- Upload the CSV by clicking into the CSV box or via drag-and-drop
- Insert a value for Hours since last attempt
- An user might enable this feature if they don’t want to excessively call a record within a short timeframe. If a value is filled, AutoReach will skip the records in the list that were recently dialed within the time defined timeframe.
Note: If there is a pink bubble next to the call record, this signifies that it is within the ‘hours since last attempt’ window.
- An admin can insert a Start and End of Calling Window which will be based on a record’s area code.
- For example: if an agent is calling a 415 San Francisco area code, AutoReach will treat the Start/End Calling window in Pacific Standard time (PST).
Example: if an agent is calling a 415 San Francisco area code, AutoReach will treat the Start/End Calling window in Pacific Standard time (PST).
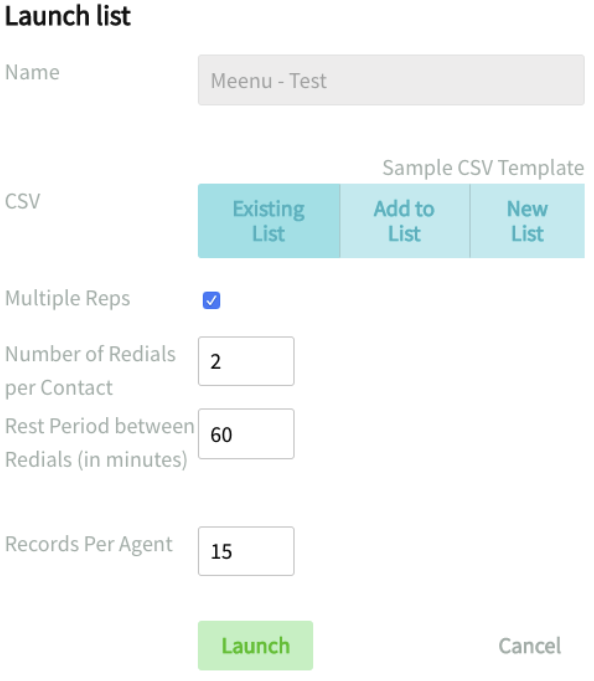
- Multi-rep lists can only be created by a supervisor or admin. To enable a multi-rep list, select Multiple Reps to see the following settings:
-
- Enter the desired values for:
- Number of Redials per Contact: max number of times a record will be called
- Rest Period between Redials (in minutes): the allotted time a record will need to wait until it can be called again
- Records Per Agent: number of records that an agent can see in their dialing session at any given time
- Enter the desired values for:
- Save List
Once lists are saved, they will appear in the AutoReach My Lists homepage.
Assigning Lists
Those with an Admin or Supervisor role in AutoReach have the ability to create individual or multi-rep lists for agents. Once the lists are created, you’ll have to assign to them to your agents
- Select Manage Assigned Lists on the navigation menu bar
- Click Edit next to the list that you’d like to configure
- In the Assignees field, type the agent(s) that you’d like to add
- Save
- Now the assigned lists will appear in your agents’ respective My Lists homepage
FAQ: Why is the Managed Assigned Lists button missing from my nav bar?
This setting will only appear if you are in Assignment Mode. To enable Account Settings > Allow Reps To Create Lists = False (Unchecked)